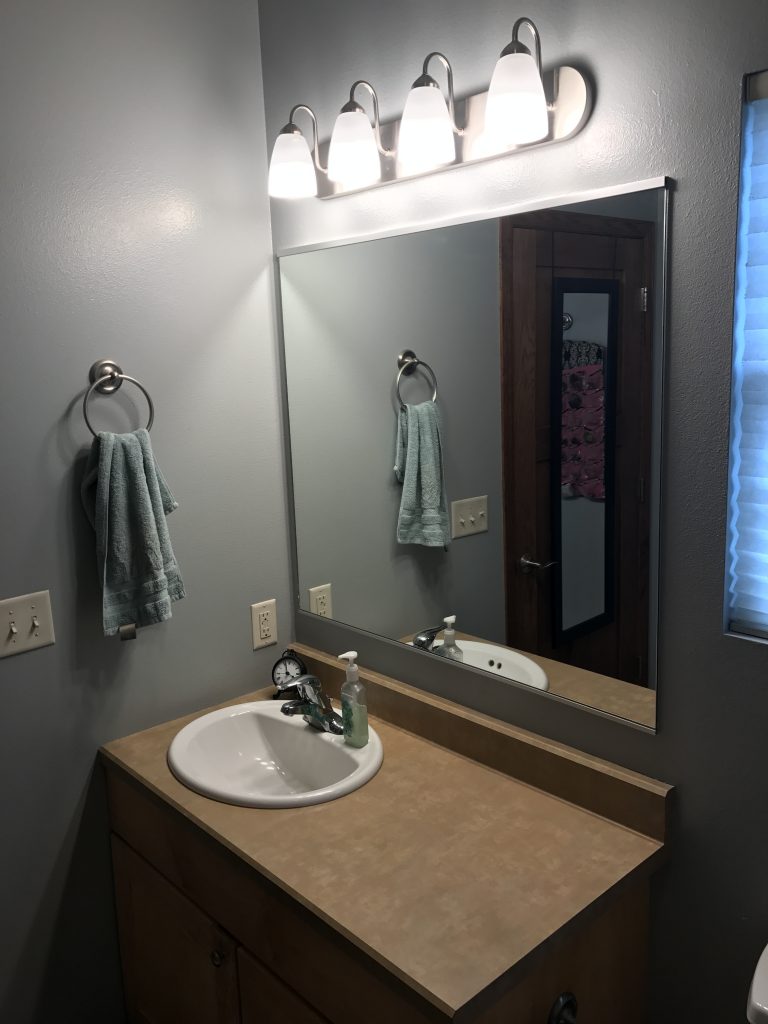
Our master bathroom is great, but the sink and mirror configuration has always bothered me. The mirror sits directly over the sink and it’s tiny. Most mornings, I need to use the sink to brush my teeth, and my wife needs the mirror to do her makeup. The vanity lights needed to be replaced, too, as one of the fixtures was broken.
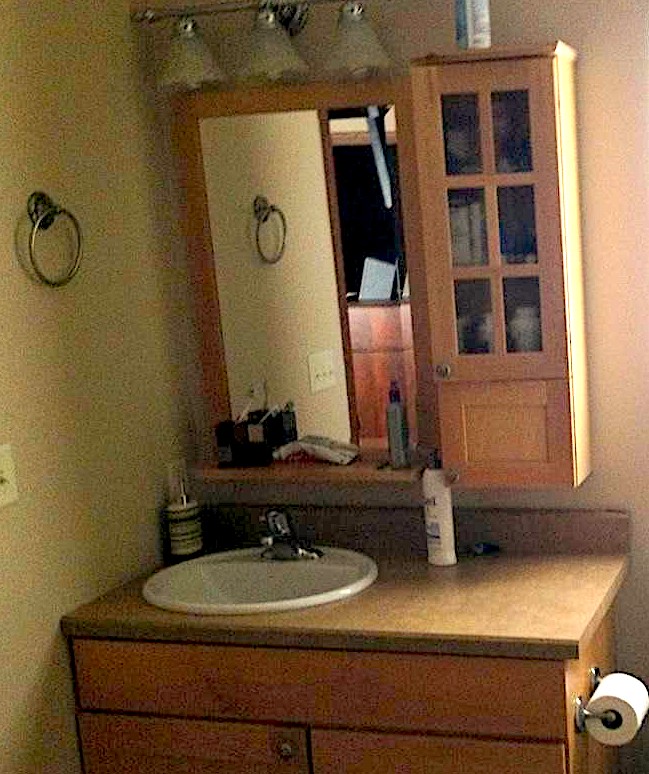
After three years, it dawned on me that we could easily remove the medicine cabinet and install a larger mirror to cover the entire vanity. The only hard part would be moving the light so it would also be centered over the vanity instead of the sink.
Mirror
When remodeling a past bathroom, I was able to buy a custom-sized mirror at the local glass shop at a great price, so I decided to go that route again. I was able to get 1/4″ glass for just under $7/ft². The vanity is 42″ wide, and the lights were 40″ above the vanity, so I decided to go with a 41″ wide by 36″ tall mirror at a cost of $70.
To mount the mirror, the glass shop provided two pieces of J-Channel. It’s possible to glue the mirror on the wall, but the J-Channel has worked for me in the past, and it worked here again. The J-Channel strips are mounted to the wall using screws. If you’re lucky, some of the holes will line up with studs. If you’re not, you need to use drywall anchors, and I suggest you use a lot. You could also drill your own holes in the J-Channel where they would align with studs. I had one of the holes on the bottom J-channel line up with a stud, and I used drywall anchors for the rest. I ended up using four screws for each J-Channel.
Once mounted, you need to slide the mirror up into the top channel and then back down into the bottom channel. In order to do this, the top J-Channel is a little deeper than the bottom, and they have to be mounted at the perfect distance. Do a lot of thinking about how this will work before mounting, as there is little margin for error! And, obviously, take care to make sure your strips are perfectly level.
Note: Before adding the mirror, make sure to place thin rubber shims in the bottom J-Channel. If you don’t, the mirror sits on the metal and rattles.
Vanity Lights
As I mentioned earlier, the vanity lights needed to be replaced and moved to the right. Rather than moving the junction box, I chose to buy a vanity that had a large mounting plate, allowing the lights to be mounted to the side of the junction box. We looked at several lights at the local Menards, but we eventually found a style we liked at a reasonable price on Amazon.
The lights had a metal bracket that had to be mounted to the wall over the junction box. Since I was centering the new lights a few inches to the right, I had to cut a hole in the bracket over the junction box. I also added a rubber grommet to keep the wires from rubbing on the bracket before I pulled them through. From that point, it was just a matter of connecting the wires and adding bulbs. For bulbs, I recently replaced most of my lights with LED bulbs as recommended by The Sweethome, and they worked perfectly here.
Results
Prior to the install, I spent about a half hour searching for vanity lights and two trips to the glass shop. The install itself only took about two hours.
With a total remodel cost of ~$170, the finished product was a much more functional bathroom!