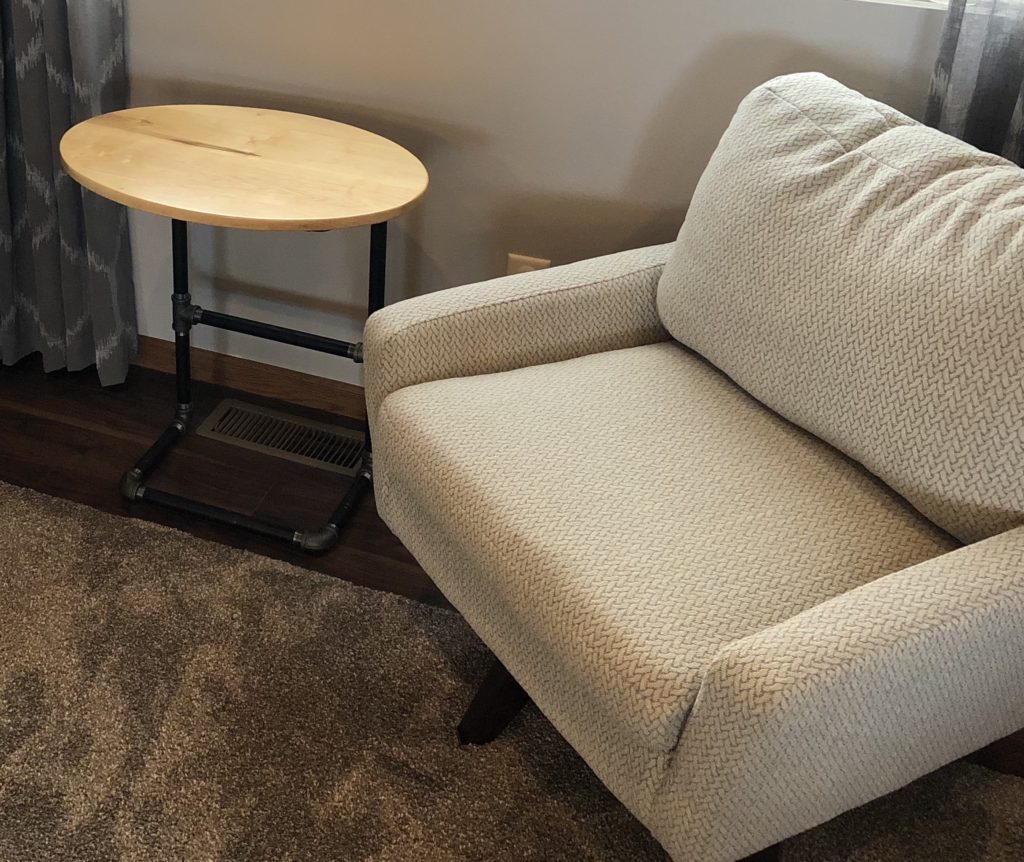
After downsizing our living room furniture, we needed a very specific end table. I spent a lot of time searching for the perfect table, eventually deciding it needed to be a “C-table.” Something like this:

But nothing was quite the right size, let alone affordable. I had to DIY it.
I had some recent experience with industrial pipe (future post), so I decided to build the structure with 3/4” pipe. For the top, we decided to go with a natural maple to match other decor. Both came from my local Menards.
Table Surface
I started with a 1″ x 6″ piece of maple, cut the board into 4 pieces, and then doweled and glued them together using a self-centering dowel jig. I used my Makita random orbital sander with 100 grit sandpaper to smooth any edges along the joint. A hand planer would probably be a better tool for this, but not something I’m comfortable with yet.

We decided to go with an oval-shaped top. I used a an old string-and-nails method to draw the oval, and then I cut it with a jigsaw.
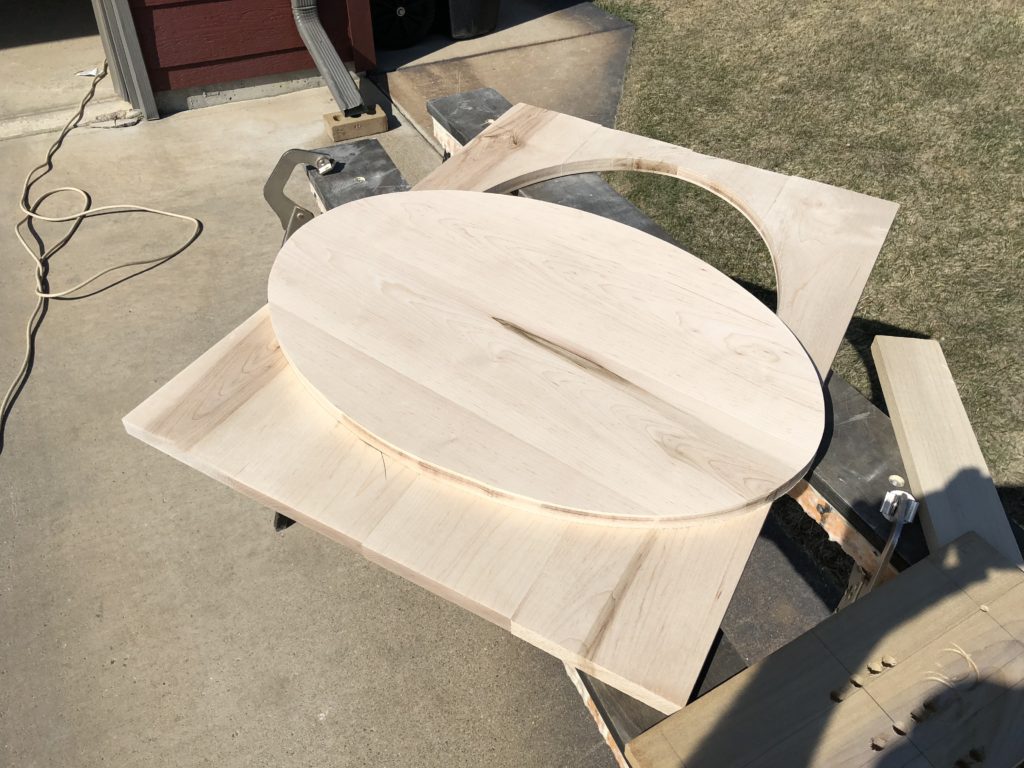
Next, I took a belt sander to the outside edge, and then continued sanding the surface with progressively higher grit sandpaper–up to 220 grit. In order to get the edges smooth, I finished the sanding by hand.
I wanted to keep the light, natural color, but I also wanted the grain to pop a little more. I’ve had good luck with Danish oil in the past, so I went with Watco’s Natural Danish Oil. Since we planned to put drinks on the table, I protected it by brushing on five coats of Minwax Polyurethane.
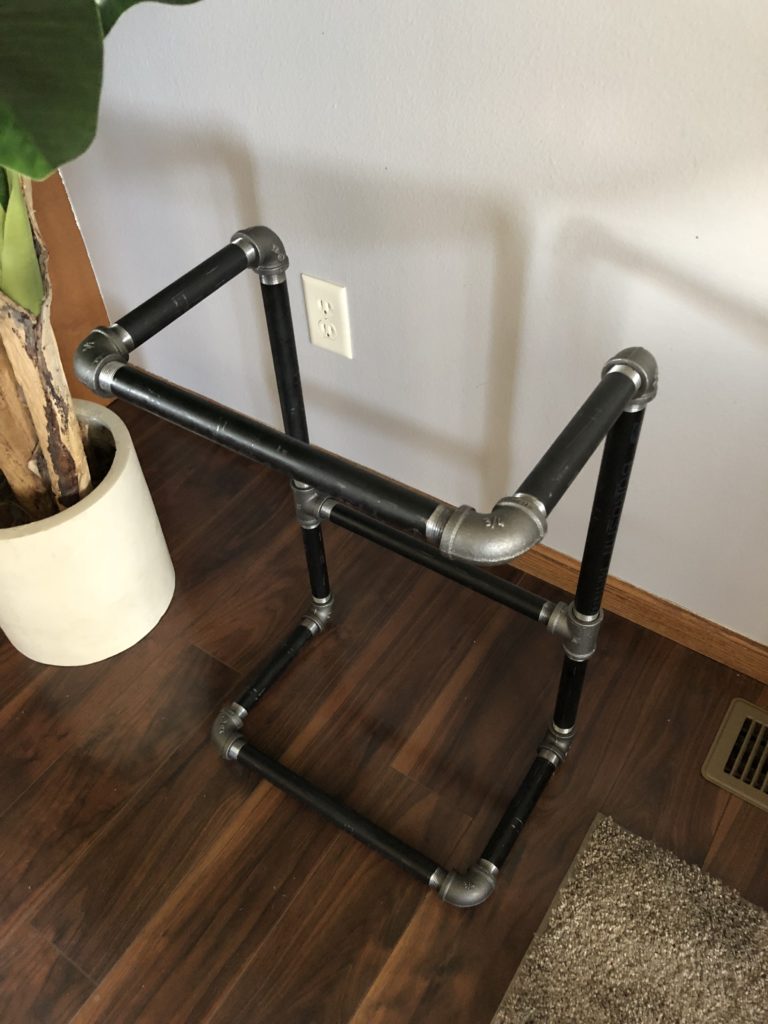
Pipe Stand
Next up was the stand itself. I used bought 10′ section of 3/4″ black pipe and then cut and threaded the ends myself, using three tools (and copious amounts of thread oil):
- Pipe Cutter – RIDGID 29963
- Pipe Threader – RIDGID 36345
- Pipe Vice – Steel Dragon 40205 (a vice is an absolute necessity)
Once cut and threaded, it was just a matter of screwing them together with elbows and tees.
Aside: One thing to keep in mind when building something like this is the direction your pipes need to screw together–if building a square, you’re last connection will require you to unscrew something (think about it!) The solution to this is to either screw those parts in half-way or to use a union connector…or just design something that isn’t circular! I went the first option.
I left the pipe and connectors as is, but I would consider spray-painting them black for future applications, followed by a spray polyurethane.
To install the top, I simply used screwed the pipe structure to the wood surface with 3/4″ pipe straps. The final product is below.
Thanks for reading!